Plan the tray and prepare your workspace
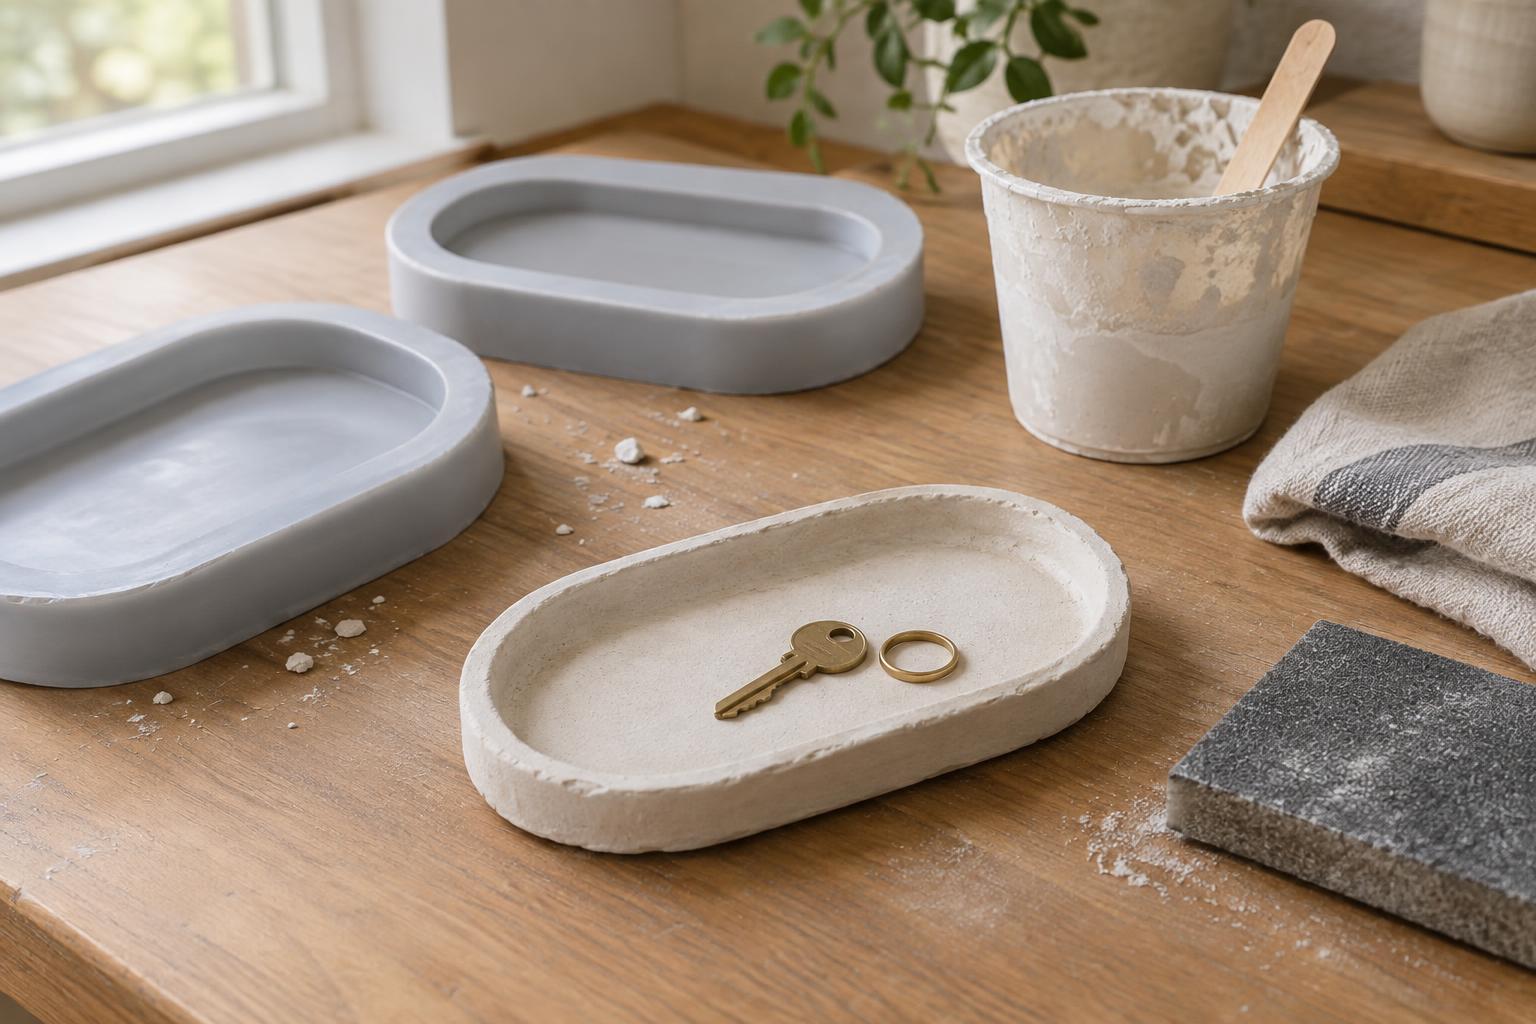
A shallow trinket tray is a good first plaster project because its shape is simple and the finished piece has an everyday use. Choose a flexible silicone mold with a flat base and a raised edge. A mold made for casting is easiest to release; an improvised container may grip the plaster or leave a rough rim. Before mixing anything, set the empty mold on a level surface and check that it is clean and completely dry.
Cover your work area, then gather casting plaster, clean water, a mixing cup, a stirrer and a separate container for scraps. Read the plaster package for its recommended water-to-powder ratio and handling times, as these vary by product. Make only enough for one tray until you know how much your mold holds. Keep plaster powder away from your face while measuring, and avoid breathing the dust. Gloves can help keep wet plaster off your skin.
Mix a small, smooth batch
Measure the water and powder according to the package rather than adjusting the mixture by eye. Put the water in the mixing cup first, then add the plaster gradually so it can wet evenly. Let the powder absorb water briefly if the product directions call for it. Stir slowly, scraping the sides and bottom of the cup until no dry pockets remain. Vigorous stirring can introduce bubbles that later show on the tray’s surface.
The mixture should pour readily without large lumps, but its exact consistency depends on the plaster you use. Resist adding extra water simply to gain more working time: changing the ratio may leave the casting weaker or slower to dry. Once mixing begins, work without long pauses. Plaster can warm as it sets, so keep batches small and do not hold a cup of setting plaster against your skin.
Pour carefully and let the plaster set
Pour the mixture into one spot near the center of the mold and let it spread toward the edges. A slow pour gives trapped air more opportunity to escape. If the mold has a detailed rim, gently nudge a little wet plaster into those areas with the stirrer. Tap the mold lightly on the work surface several times to bring visible bubbles upward. Avoid shaking so hard that plaster splashes over the rim or moves the mold out of level.
Leave the filled mold undisturbed for the time specified on the package. Setting is not the same as being fully dry: a casting may feel firm while it still contains moisture. When it is ready to release, flex the silicone away from the edges and support the tray as you lift it out. Do not pull on a thin rim. If the tray bends or its surface marks easily, give it more time before handling or finishing it.
Smooth and protect the finished surface
Once the tray has dried thoroughly, inspect its rim and base. Small rough spots can be smoothed with fine sandpaper using gentle pressure; support the piece so you do not snap an edge. Sand in a well-ventilated area and avoid breathing the dust. Wipe away residue with a slightly damp cloth and allow the tray to dry again before adding any finish. A few pinholes are normal in a handmade casting and can be left as part of its character.
You can keep the tray matte and unpainted or add a thin coat of suitable craft paint. If you want to make the surface easier to wipe, choose a sealer intended for plaster or other porous decorative objects and follow its directions. Test the finish on the underside first, since it may change the plaster’s color or sheen. Even when sealed, a small plaster tray is best treated as a decorative catchall, not as a dish for food or standing water.
Use the tray and clean up responsibly
Place the finished tray on a bedside table, desk or shelf for lightweight items such as rings, hair clips or keys. Adding small felt pads underneath can help protect furniture and steady a slightly uneven base. If the tray develops a chip, consider leaving it as a decorative sample rather than continuing to use it where the damaged edge might catch on objects.
Let leftover plaster harden in its mixing cup or on a disposable liner, then dispose of the solid waste according to local requirements. Wipe tools before washing them, and never pour wet plaster or plaster-laden rinse water down a drain, where it can harden. Once the workspace is clean, note how much mixture filled the mold and whether bubbles formed in any particular spot. Those observations will make your next small casting easier to plan.