Why paint creeps under a stencil
A stencil works best when its edges sit close to the surface and only a small amount of paint reaches them at once. Wood makes that harder than a smooth sheet of paper. Raised grain, small dents and open pores can leave gaps beneath the stencil. A heavily loaded brush or roller then pushes paint into those gaps, softening the outline.
The goal is not to press harder or use more paint. It is to make the surface reasonably even, hold the stencil steady and apply color gradually. These steps are especially useful on small decorative objects such as trays, boxes and wooden plaques, where a slight blur can change the look of a simple motif.
Prepare a smooth, stable surface
Start with clean, dry wood. Remove dust, grease and any loose finish. If the surface feels rough, sand it lightly until raised fibers no longer catch on your hand, then clear away the sanding dust. Pay attention to the area where the stencil will sit: a ridge across a letter or narrow pattern edge can create a path for paint.
Bare wood can absorb paint unevenly. For a more predictable edge, apply a suitable primer or clear sealer and let it dry according to its instructions. If the coating raises the grain, sand lightly and remove the dust before stenciling. You can also stencil over a fully dry base coat. Whichever finish you choose, test your paint and stencil method on an offcut or an inconspicuous area first, particularly if you plan to leave natural grain visible.
Avoid placing a detailed stencil across deep grooves, joints or prominent knots if you can. Preparation improves the surface, but it cannot make a flexible stencil lie flat over every recess.
Keep the stencil flat without damaging the finish
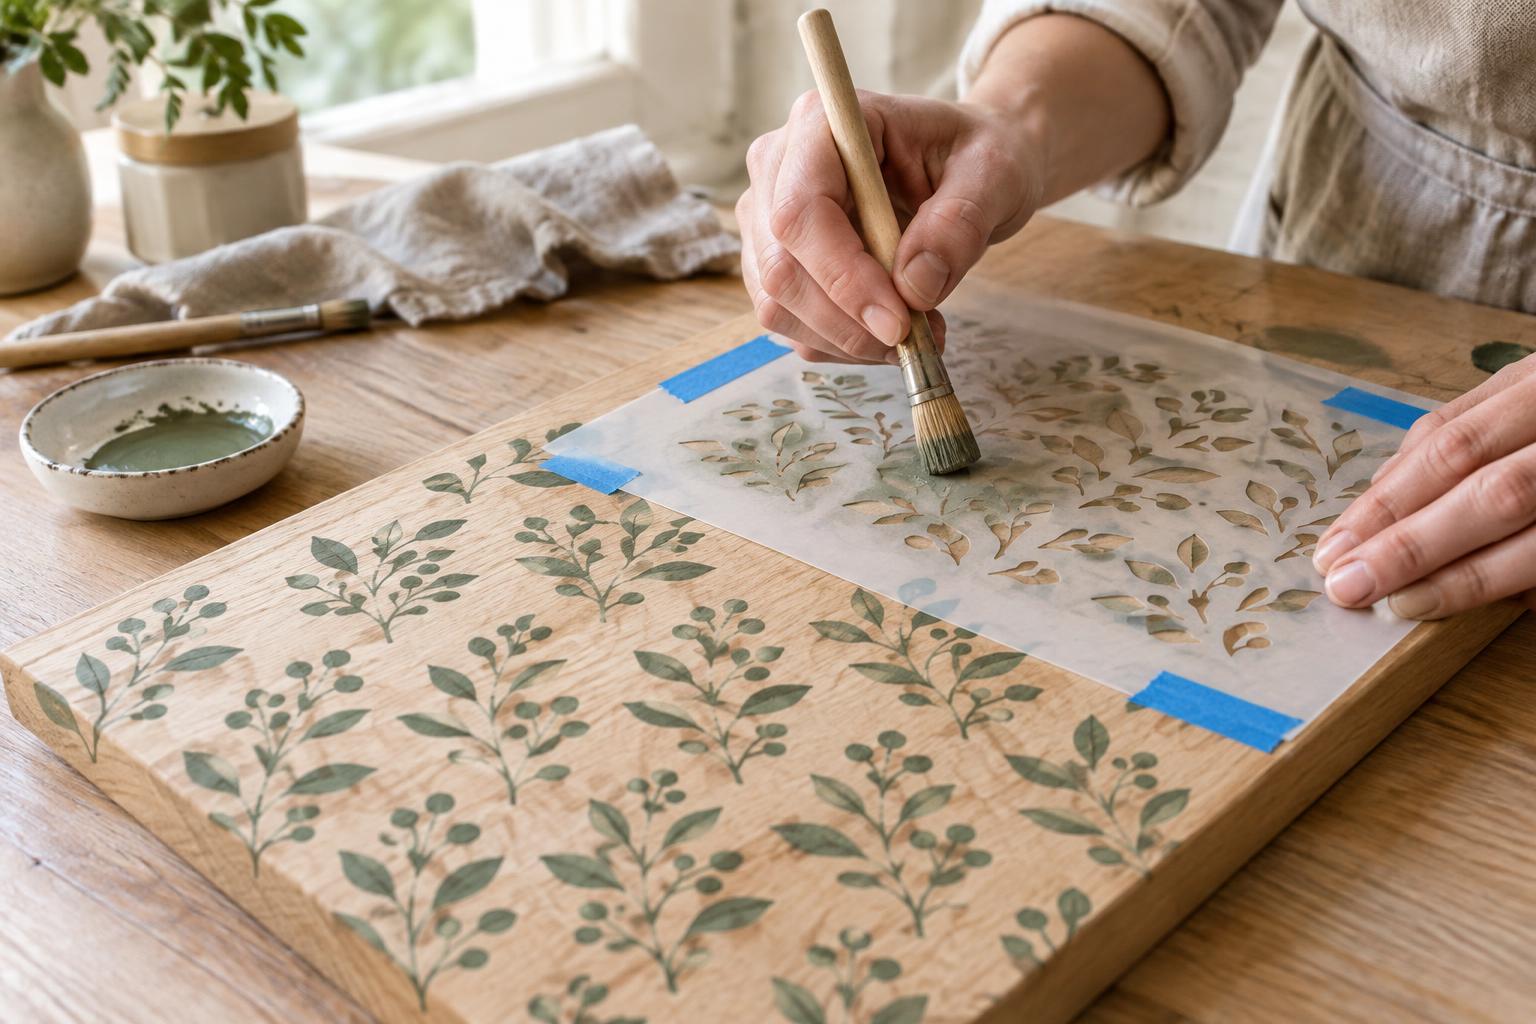
Position the stencil before opening the paint. Mark its location lightly if you need to repeat the design, then secure the outer edges with low-tack painter’s tape. For a larger or intricate stencil, a light application of repositionable stencil adhesive may help the inner details stay in contact with the wood. Check that the adhesive is compatible with both the stencil and the surface, and test it where any residue or lifted finish would not show.
Press along the cut edges with clean fingers so the stencil lies flat, but do not stretch it out of shape. If you are working over a painted base, make sure that coat has dried thoroughly before adding tape or adhesive. When repeating a pattern, pause to clean built-up paint from the underside of the stencil; dried ridges can lift its edges on the next placement.
Use less paint than you think you need
A stencil brush, dense foam pouncer or small foam roller can all work. Load the tool sparingly, then offload most of the paint onto a scrap surface or paper towel. It should leave color without forming a wet bead. Build opacity with several thin passes rather than trying to cover the wood in one coat.
With a brush or pouncer, tap the paint straight up and down. Avoid sweeping bristles toward an opening, which can drive paint beneath the edge. If using a roller, apply gentle pressure and make sure it is not saturated. Begin with an area away from the stencil edge to gauge how much paint the tool is depositing, then work across the design with the same light touch.
Let each thin layer settle before adding another, following the paint’s guidance where available. Too many wet passes in one spot can loosen adhesive, bend a small stencil detail or leave a raised paint ridge. A slightly translucent first pass is easier to correct than a flooded edge.
Lift, inspect and touch up
Lift the stencil carefully while the final layer is no longer runny but before paint has hardened across the stencil edge. Hold one side down as you peel back the other to reduce smearing. For a repeated motif, clean and dry the stencil before repositioning it, and check that the fresh design will not overlap paint that is still tacky.
If you spot a small bleed, allow it to dry before correcting it with a fine brush and the background color. Trying to wipe a wet mark often spreads it into the grain. A craft knife may help remove a tiny raised fleck from a durable, fully dry finish, but test first and use a light hand to avoid scratching the wood.
Once the design has dried, decide whether it needs a protective topcoat based on how the object will be used. Test the topcoat over your paint combination before coating the finished piece. For future projects, a clean test impression on scrap wood is a useful reference: it shows whether the next improvement should be a flatter surface, firmer stencil contact or simply less paint.