Gather materials and choose a mold
A removable mold gives a papier-mâché bowl its shape while the paper is wet, then lifts away once the shell is dry. Choose a smooth bowl with a rounded profile and no undercut, such as a narrow neck or pronounced lip that could trap the finished piece. You will build over the outside of the bowl, so its exterior determines the shape of your new bowl’s interior. A modest size is easiest for a first attempt: it takes less time to layer and is simpler to dry evenly.
Gather lightweight paper, paste, plastic wrap, a soft brush, scissors, and a work surface you can wipe clean. Torn strips of newspaper or other uncoated paper bend readily around curves; save a few smaller pieces for the base and rim. For paste, mix white craft glue with a little water until it brushes on easily without running. You can instead use a smooth flour-and-water paste, but a glue-based paste is a convenient choice if the bowl may be stored for a long time. In either case, the finished object should be considered decorative rather than food-safe.
Prepare the removable form
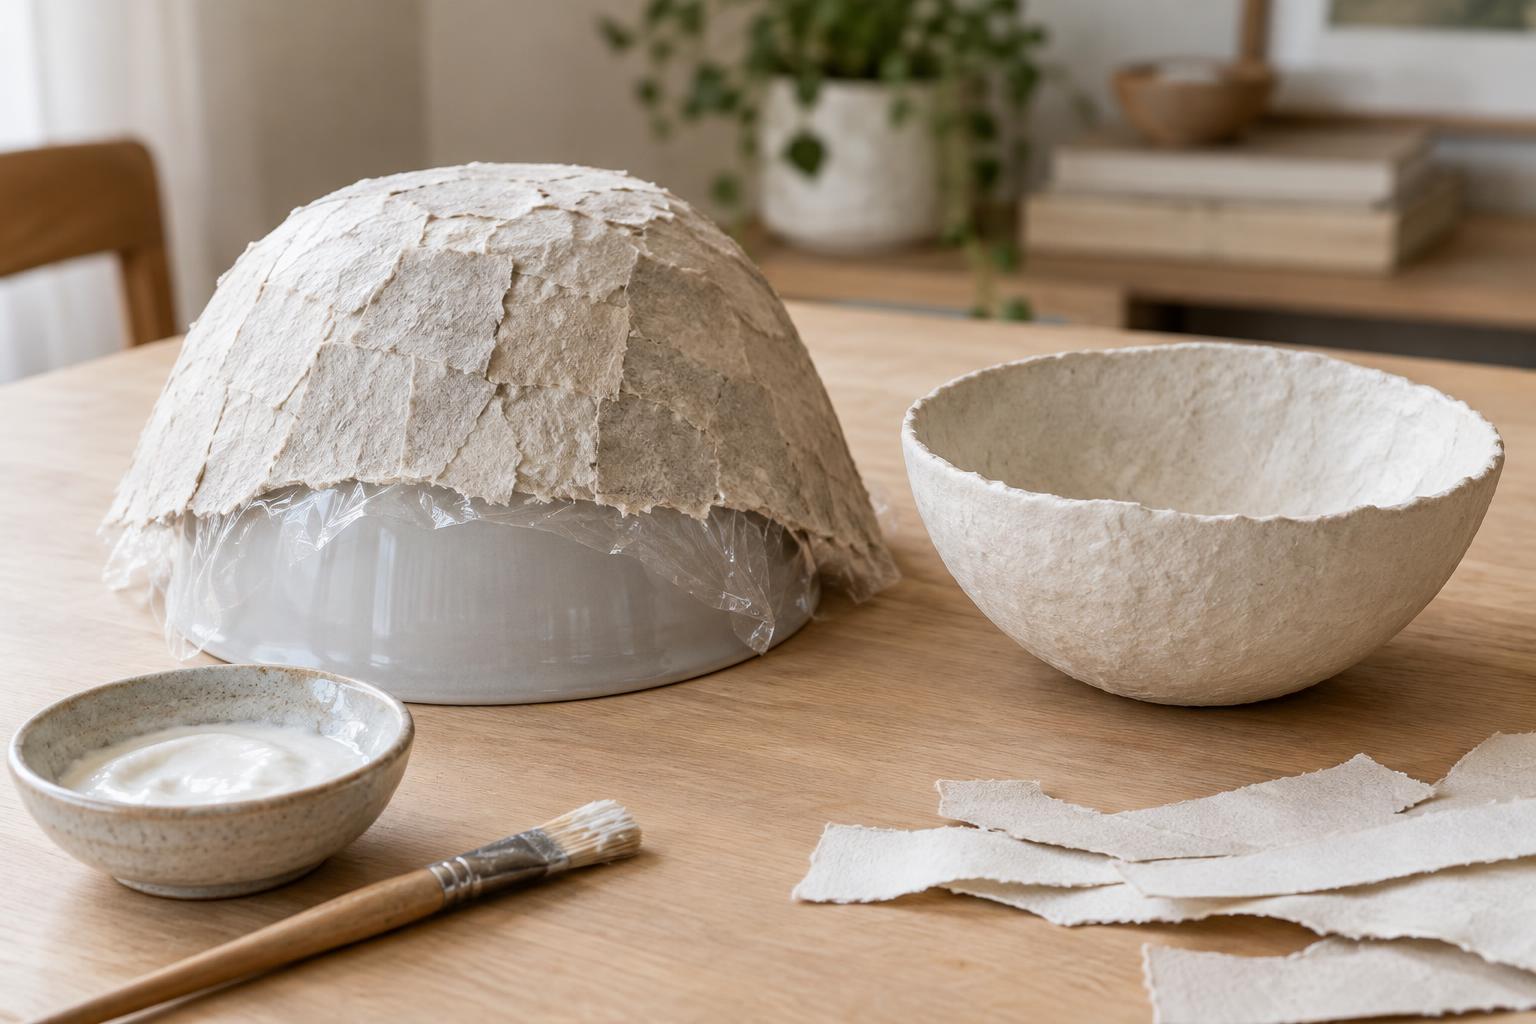
Turn the mold upside down and cover its exterior with plastic wrap. Smooth the wrap over the bottom and sides, leaving enough extra below the intended rim to help you lift it later. Small wrinkles will leave some texture in the paper, so press them flat where you can; a few remaining creases can become part of the handmade surface. Set the wrapped mold on a stable jar or container if that makes it easier to reach the sides without touching the wet layers.
Decide where the rim should fall before applying paste. You can mark that level on the plastic wrap with a small piece of removable tape. Avoid carrying paper past a projecting edge of the original bowl, even if you want a deep finished shape. Keeping the new rim on an open, gently sloping part of the mold will make release much easier.
Build a strong, even shell
Brush a little paste onto the wrapped mold, then lay down the first paper strip. Brush paste over the strip and smooth it with your fingers or brush to remove trapped air. Add strips in different directions, overlapping their edges rather than lining them up like tiles. Use shorter pieces where the curve changes quickly. Aim for complete coverage without leaving thick folds, especially near the base, where a lumpy buildup may keep the finished bowl from sitting steadily.
Once the first layer covers the form, continue until you have several thin, even layers. Alternate the direction of the strips as you go, and extend each layer to approximately the same rim line. The exact number of layers depends on the paper and the size of the bowl; the goal is a shell that feels firm after drying rather than a particular count. If the surface becomes very wet or starts to slide, pause and let it set before adding more. A final layer of smaller, carefully smoothed pieces can make the surface easier to paint.
Dry and release the bowl
Leave the paper on its mold in a well-ventilated place until it feels dry and firm. Drying may take longer at the base, where layers overlap most. Check for cool, soft, or darker patches before attempting to remove the shell. Rushing this stage can cause the bowl to bend or tear. Keep it away from direct heat, which may dry the outside before the inner layers have had a chance to dry.
When the shell is ready, gently loosen the plastic wrap at the rim and work your way around. Lift the paper bowl and wrap off the mold together, then peel the wrap away from the inside. If the shell flexes significantly, let it dry further off the mold with plenty of air around it. Trim an uneven rim with scissors, taking off a little at a time. For a neater edge, paste a narrow strip of paper around the rim, smoothing it over both sides, and allow that strip to dry fully.
Finish and use your decorative bowl
Once completely dry, the bowl can be painted with thin coats of water-based craft paint. Let each coat dry before adding the next so moisture does not soften the shell. You might keep the visible paper pattern, use one quiet color, or paint the interior and exterior in contrasting shades. A suitable clear craft finish can help protect the painted surface from handling, but it will not turn papier-mâché into a washable or waterproof vessel.
Use the finished bowl for dry, lightweight objects such as wrapped keepsakes or decorative paper pieces, or display it empty on a shelf. Do not use it for food, water, damp items, or a lit candle. If you make another, try changing one element at a time—the mold’s curve, the width of the paper strips, or the finish. The same basic process can produce bowls with very different proportions while keeping the mold ready to use again.