Choose foil and plan a simple design
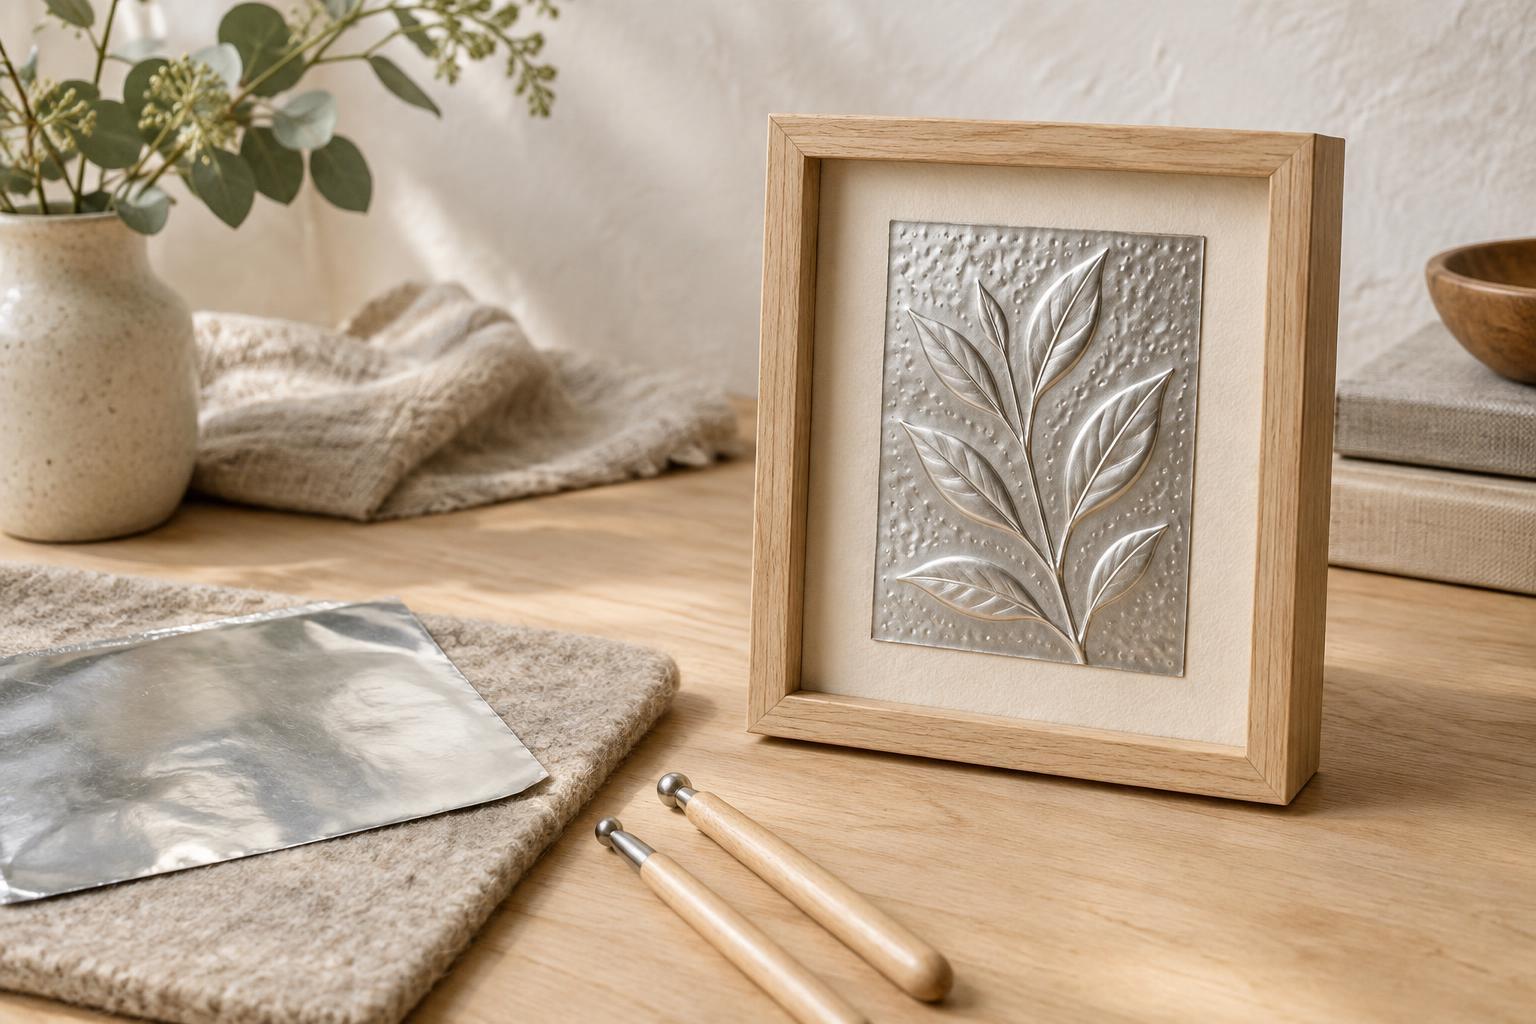
Embossing gives thin metal a raised pattern by pressing into it rather than cutting through it. For a first framed piece, choose soft metal craft foil sold for embossing. It is easier to shape than household aluminum foil, which tends to wrinkle and tear. Gather a blunt embossing stylus, a pencil, paper for your design, low-tack tape, a soft work surface such as craft foam, and a rigid board for mounting. A spoon handle or other smooth, rounded tool can help flatten larger areas. Avoid sharp points, which can puncture the foil.
Plan a design with a clear outline and a few areas of contrasting texture. A leaf, shell, flower or simple geometric arrangement works well at a small scale. Leave an unworked border around the image so you have room to handle and mount the foil. Draw the design at its final size on paper and place it inside your frame opening before you begin. Lines that look distinct on paper can crowd together in metal, so give small details more space than you think they need.
Cut the foil slightly larger than the visible artwork, allowing extra material for mounting. Cut edges can be sharp; handle them carefully and fold them behind the backing where possible. Keep the foil flat until you are ready to work, since an accidental crease may remain visible in the finished piece.
Transfer the drawing and raise the main lines
Set the foil on the soft work surface and tape the paper design over it at the corners. Trace the main lines with a pencil or blunt stylus, using light, even pressure. Lift one corner of the paper to check that the marks have transferred before removing the drawing entirely. This first pass is a guide, not the finished relief; pressing hard now can produce grooves that are difficult to refine.
Turn the foil over so the traced lines face down against the soft surface. Work along the reverse of each line with a rounded stylus, gradually pushing the metal outward. Make several gentle passes instead of one forceful pass. To broaden a raised shape, press within its outline and move from the edges toward the center. Flip the foil occasionally to inspect the front. If a line looks uneven, support the piece on a firm, smooth surface and gently tidy the adjacent flat area rather than trying to erase the line completely.
Direction matters when you add depth. Working from the back creates a raised area on the front; pressing from the front creates a recessed mark. You can use both for contrast, but decide which parts should stand proud before adding detail. A restrained mix of raised outlines and shallow recessed accents often reads more clearly from a distance than relief across every part of the sheet.
Add texture and finish the surface
Texture helps separate the subject from its background. With the foil face up on the soft surface, press small dots, short strokes or closely spaced lines into selected areas. Try a textured border around a smooth central motif, or give different leaves distinct patterns. Test each tool on a spare piece of foil first; a mark that looks subtle in your hand may become prominent under side lighting.
If you want a flatter background around raised shapes, place the foil face up on a firm, smooth surface and rub gently with a rounded tool. Work around the relief rather than across it. Light pressure preserves the raised design and reduces stray bumps. Stop before the metal becomes overworked: repeatedly bending the same spot may weaken it. Small irregularities are part of a hand-embossed surface and often become less noticeable once the piece is mounted.
Leave the metal as it is for a reflective finish, or use a surface treatment intended for the particular craft foil you bought. Test finishes on a scrap, follow the product directions and let any coating dry fully before framing. An untreated piece can be effective, especially where the frame and backing provide a quiet contrast.
Mount and frame without crushing the relief
Choose a backing board that supports the foil without bending. You can attach the unworked border to the back of the board with suitable tape, or fold that border neatly around the board’s edges. First check how any tape or adhesive behaves on a scrap of foil and backing. Keep attachment points away from the raised image, and avoid pulling the metal so tightly that its surface buckles.
A mat or a deep frame can create space between the relief and the glazing. Check the clearance with the frame laid flat before closing it; glass or acrylic pressed against the design may flatten its highest points. A backing in a contrasting color can define the artwork if you leave a visible margin. Once framed, place the piece where light can cross its surface from the side. Changing the angle slightly can reveal more of the texture without adding anything to the design.