Choose paper and plan the bead shape
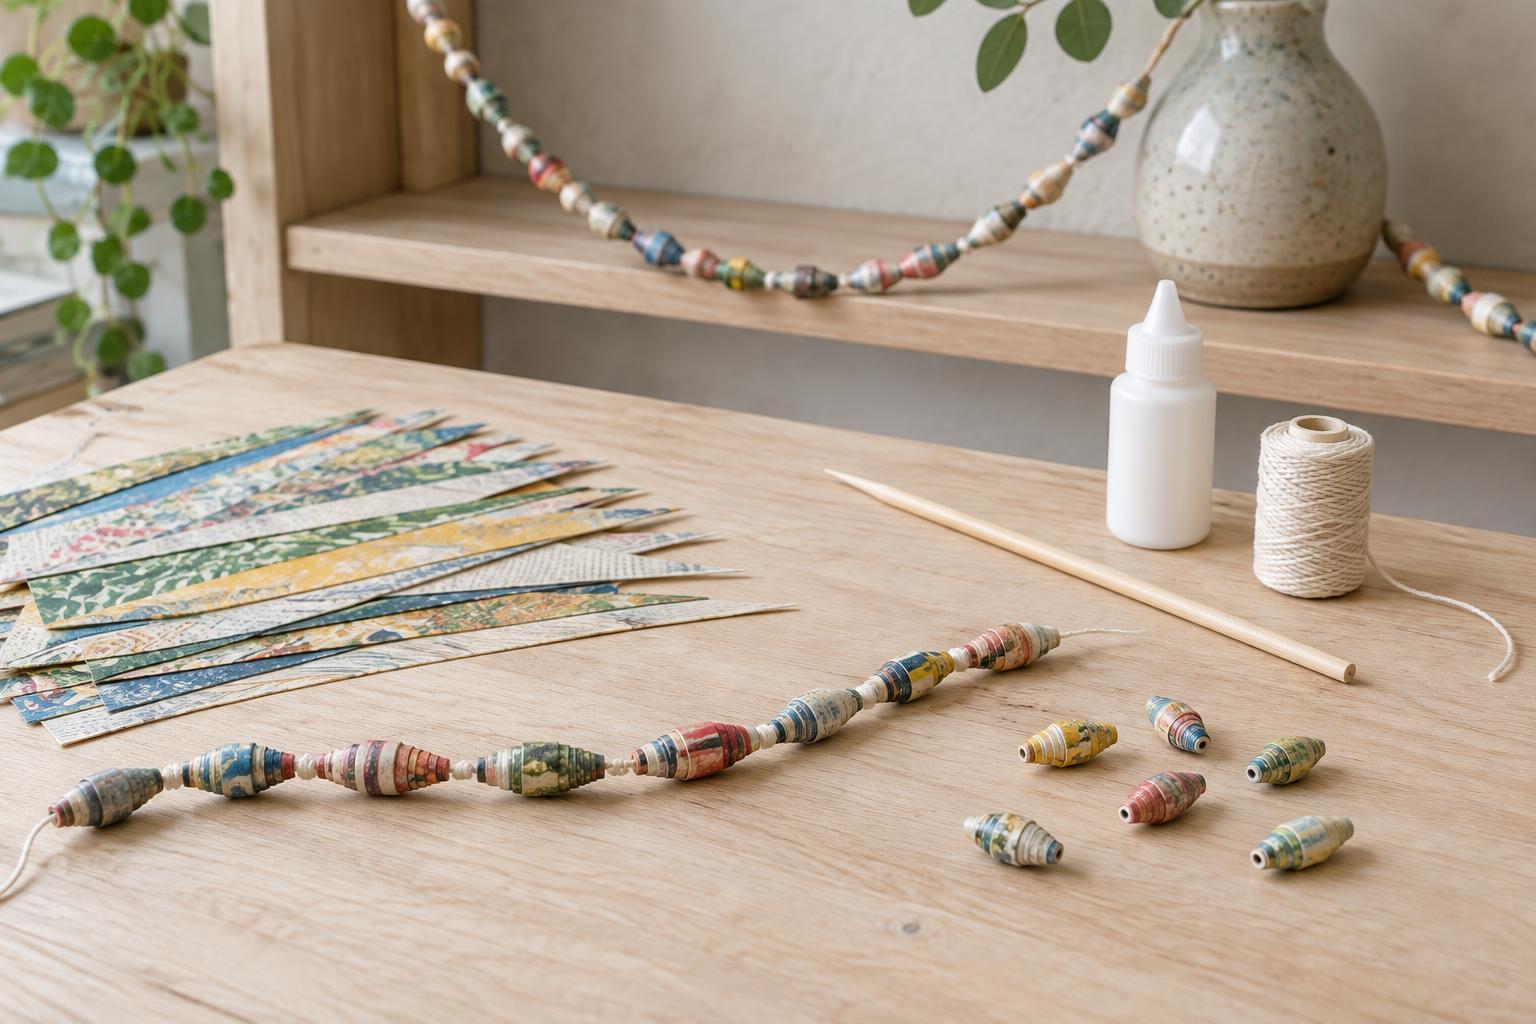
Paper beads are made by winding narrow strips around a small rod. The strip’s shape determines the bead’s outline: a long triangle produces a tapered bead with a fuller middle, while a straight strip makes a more even cylinder. Magazine pages, lightweight wrapping paper and printed craft paper are good starting points. Thick cardstock can be difficult to roll tightly, especially for small beads.
Before cutting a whole batch, make two or three test beads. A strip about 2 cm wide at its broad end and 20 cm long is a manageable starting size for a tapered bead. Adjust the length for a larger or smaller result. If the paper has a distinct pattern, remember that the narrow end will form the visible outer layer. Choose strips with colors or details you would like to see when the beads are finished.
Cut strips that roll evenly
Gather paper, a ruler, pencil, scissors, a toothpick or thin skewer, and a small amount of craft glue. Mark long triangles on the back of the paper, placing each point roughly opposite the center of its wide end. Cut carefully along the marks. Slight differences between strips can give a handmade garland character, but a straight cut makes each bead easier to control.
Keep the strips in a shallow tray or envelope so their narrow tips do not curl or get lost among scraps. If you want the garland to have a rhythm, sort the strips into a simple sequence before rolling: for example, two pale beads followed by one bright bead. Planning the order now helps you see whether you have enough of each color.
Roll, glue and dry each bead
Place the wide end of a strip against the toothpick or skewer and start rolling with light, steady pressure. Keep the paper centered as you turn. For a tapered bead, guide the triangle’s point toward the middle of the growing shape. If the layers drift to one side, gently correct them while the paper is still loose rather than pulling on the finished bead.
When only the narrow tip remains, add a small dab of glue to its underside and roll it down smoothly. Too much glue can soak the paper or stick the bead to the rod. Slide the bead off carefully and set it aside to dry. If it resists, twist the rod gently instead of tugging on the paper. Let the glue dry fully before handling the bead further.
Add a protective finish
A thin coat of clear, water-based craft finish can help paper beads resist handling and make their colors look more unified. Test the finish on one bead first, particularly if the paper has ink that might smear. Hold the bead on a toothpick, brush on a light coat and rotate it so no puddles collect at the ends. Make sure the central hole stays open.
Rest the toothpick across the edges of a small container while the coating dries, keeping the bead from touching the work surface. Add a second light coat only if the first has dried and you want a smoother surface. Even finished paper beads are best treated as indoor decoration: prolonged dampness can soften the paper or affect the finish.
String and display the garland
Once the beads are completely dry, thread them onto sturdy cotton cord or another flexible string that fits through the holes. A blunt needle can help guide soft cord through smaller openings. Lay the beads out before threading to check the color sequence and spacing. You can place small knots between groups of beads if you want the garland to drape loosely rather than bunch together.
Leave enough cord at both ends to tie the garland securely, and test its length against the shelf or display area before trimming. Paper beads work well draped over a shelf edge or arranged beside other lightweight decorative objects. Keep the garland away from flames and out of reach of young children or pets who might pull it down or put a bead in their mouth.