Choose a tray that is suitable for burning
Woodburning, also called pyrography, uses a heated tip to darken wood in controlled lines. For a first tray, choose unfinished, untreated solid wood with a fairly smooth surface. A simple shape with broad, flat areas is easier to work on than a tray with deep corners or elaborate handles. Check the label or ask the seller what the tray is made from if you are unsure.
Do not burn into paint, varnish, stain, glue-heavy composites such as MDF, pressure-treated wood or reclaimed wood of unknown origin. Heating coatings, adhesives or treatments can produce unpleasant or potentially harmful fumes. A tray sold as “natural” is not necessarily unfinished; a glossy surface or water that beads rather than soaking in may indicate a coating. If you cannot confirm what is on the wood, choose another tray rather than trying to burn through it.
Keep the intended use in mind. A decorative tray for books, candles that remain in their own holders, or wrapped items is a simpler project than one intended for direct food contact. Woodburning does not make a surface food-safe, and decorative grooves can be harder to clean.
Prepare the pattern and the workspace
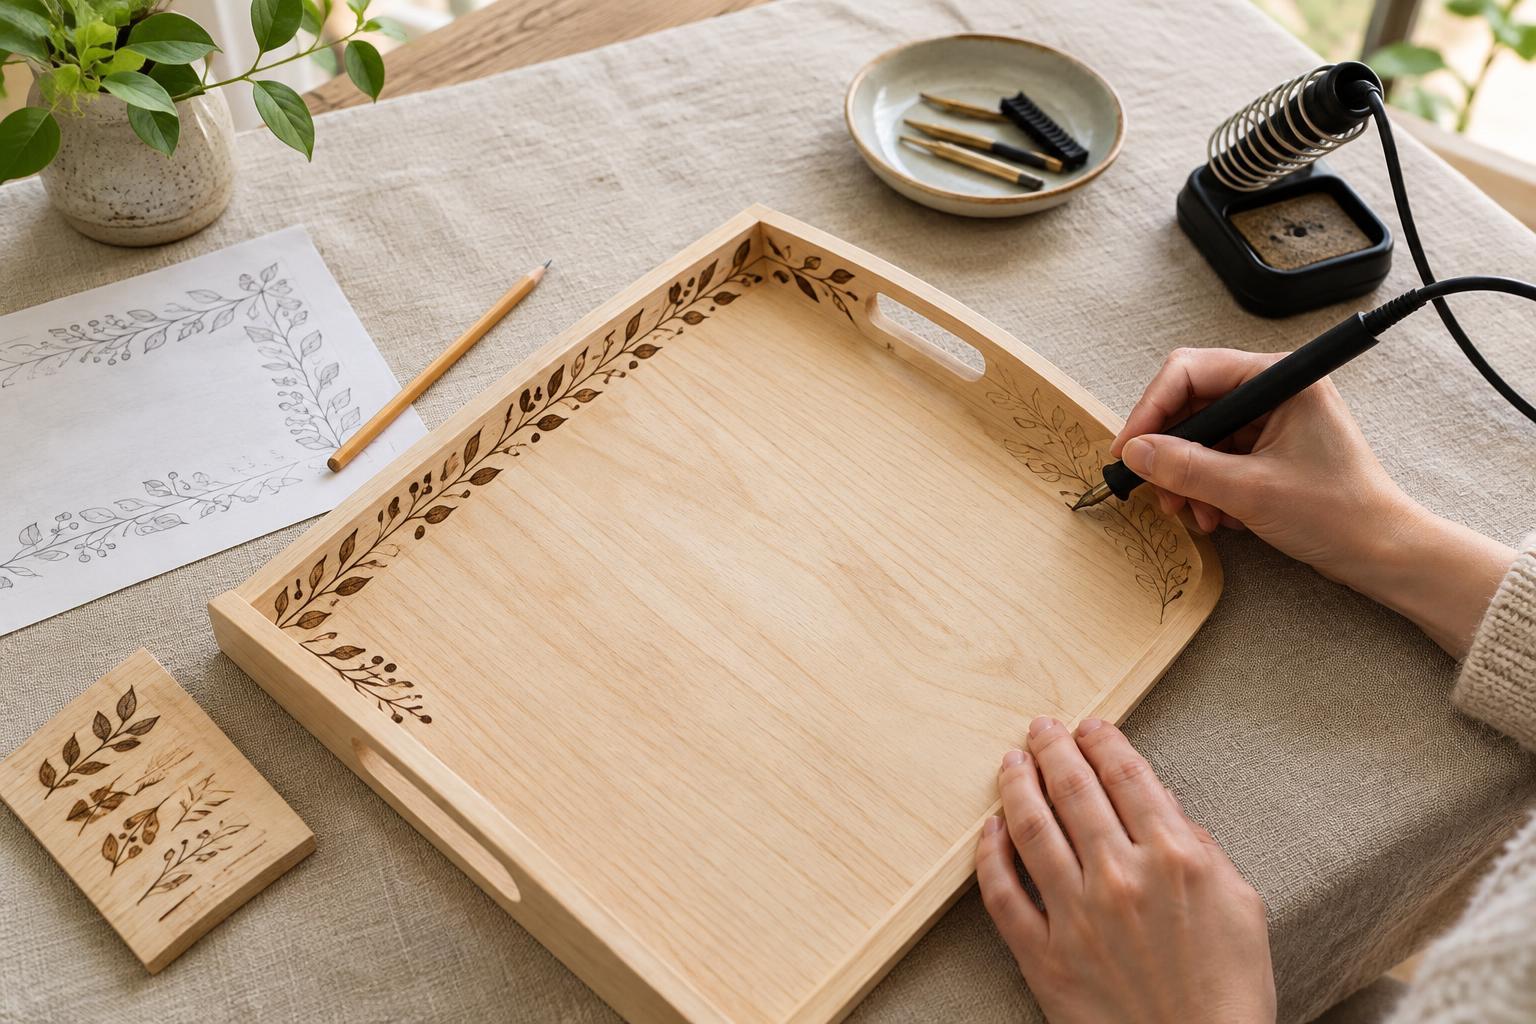
A repeating border, a few leaves at the corners, or a loose geometric design gives you room to practise without covering the entire tray. Sketch the idea on paper first. Leave space around handles and avoid placing fine details where the tip will be difficult to control. If the tray is rough, sand it lightly with the grain, then remove all sanding dust before switching on the tool.
Work where fresh air can enter and smoke can move away from your breathing zone. If you cannot ventilate the space adequately, postpone the project rather than relying on a dust mask to handle smoke. Put the tray on a stable, heat-resistant work surface, clear away paper scraps and other flammable materials, and keep children and pets out of reach. Arrange the tool cord so it cannot catch on the tray or pull the hot pen off the table.
Follow the woodburning tool manufacturer’s directions for its stand, tips and temperature settings. Keep the hot pen in its stand whenever it is not touching the wood; never set it directly on the table. Have a way to respond to an accidental fire, and do not leave the tool heating unattended.
Transfer the design and burn in stages
Draw the design lightly in pencil, or use transfer paper to place a paper pattern on the tray. Check that the lines look balanced from the angle at which the tray will usually be seen. Practise on an offcut of the same type of wood before starting: differences in grain and hardness can change how quickly a line darkens.
Begin with a simple tip and a moderate setting recommended for your tool. Let the tip do the work instead of pressing hard. Move steadily, pulling the pen toward you when that feels easier to control, and turn the tray rather than twisting your wrist into an awkward position. Build darker lines with another pass after the wood cools instead of holding the tip in one spot. Prolonged contact can create deep, uneven marks and increase the risk of scorching beyond the design.
Pause if smoke becomes noticeable, the wood starts to glow, or the tool is difficult to control. Lift the tip, put the pen in its stand and let the area cool before continuing. Work from the middle of a motif outward, or complete one section of a border at a time, so your hand does not rest on freshly burned wood. Expect slight variations in tone where the grain changes; they are part of the material rather than a reason to force every line to match.
Clean and finish the tray
When the pattern is complete, switch off and unplug the tool, then leave it in its stand until it is fully cool. Brush away loose char and erase any visible pencil marks gently. Avoid aggressive sanding across the design, which can blur fine lines. If you want a protective finish, choose one appropriate to the tray’s intended use and apply it only after the wood has cooled and the dust has been removed. Follow the finish manufacturer’s instructions for ventilation, application and curing.
Treat the finished tray as a decorative household object unless its materials and finish are specifically suitable for the way you plan to use it. For serving, keep food on plates or other suitable dishes rather than directly on the burned surface. Wipe the tray gently when needed and avoid soaking it. The most satisfying result is not necessarily the darkest pattern: clean lines, an easy-to-handle tray and a careful setup make the piece both useful and pleasant to look at.