How punch needle loops stay in place
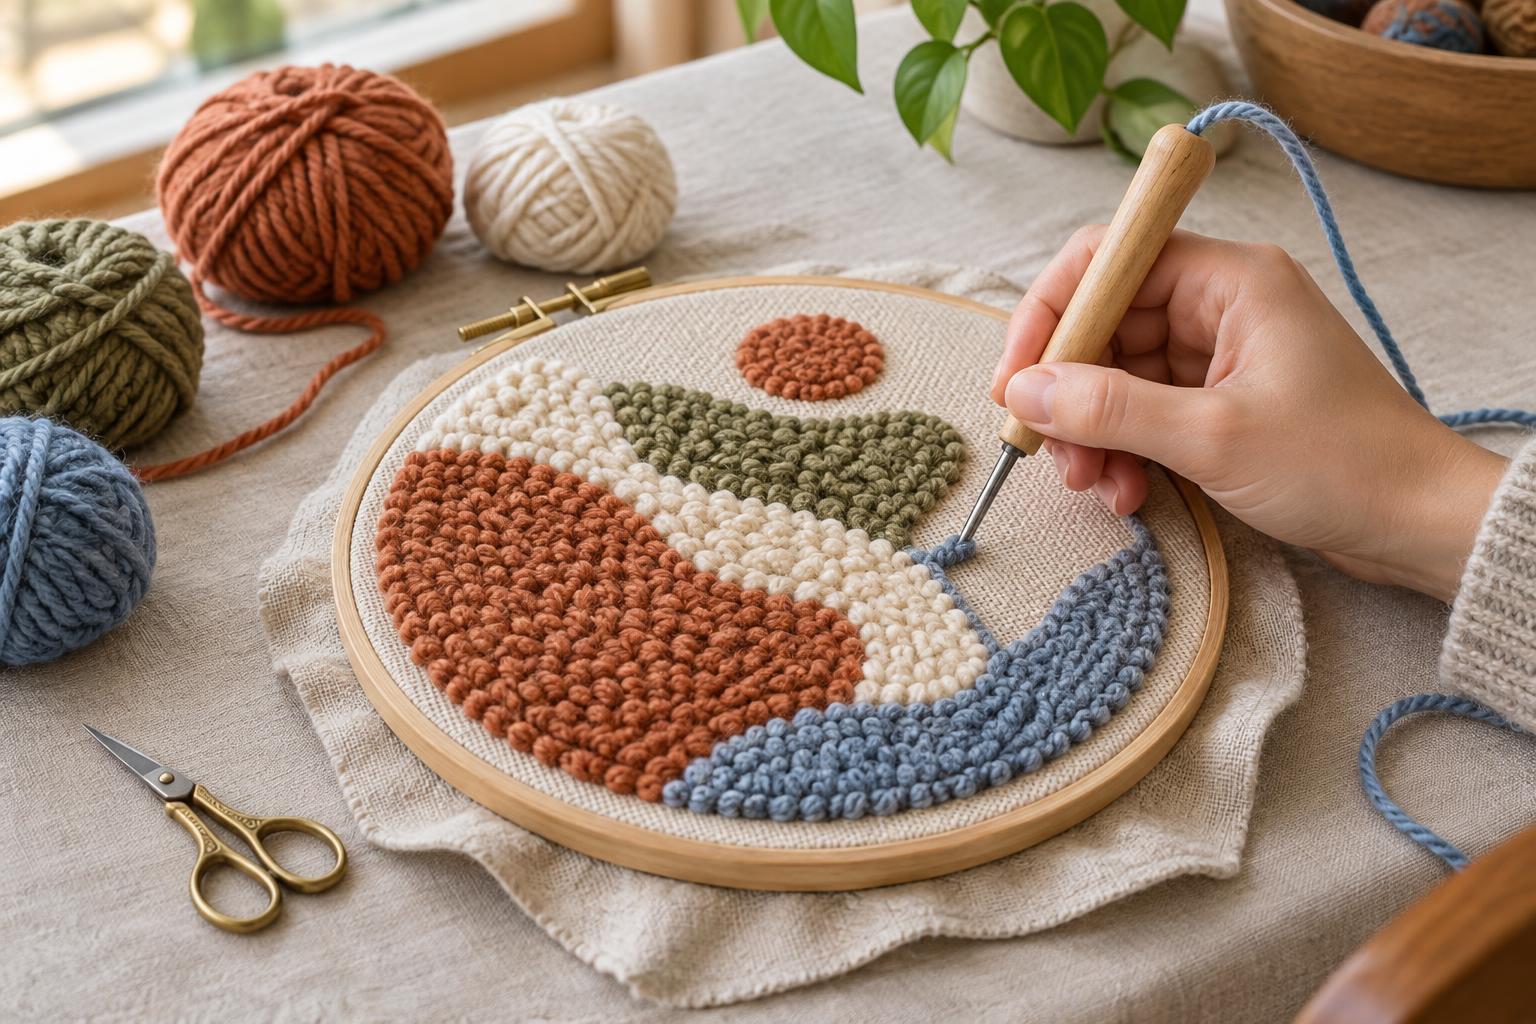
A punch needle pushes yarn through a woven foundation to form loops on the opposite side. Unlike an ordinary hand stitch, each loop is not tied off as you make it. The foundation’s threads grip the yarn, while neighboring stitches help keep it in place. That makes a wall hanging a forgiving first project: it can be displayed without the rubbing and handling that a cushion or rug might receive.
A loose loop does not always mean the whole piece needs to be redone. It may point to fabric that is too open, yarn that is being tugged as you work, or stitches spaced too far apart. Start with a small test patch using the exact fabric, yarn and needle intended for the hanging. Punch a few rows, remove the hoop and gently brush your hand across the surface. The test will show whether the loops hold and whether you like their height.
Match the foundation, yarn and needle
Choose a foundation cloth recommended for your punch needle’s size. The needle must pass through without tearing the weave, but the cloth should close around the yarn when the needle comes back out. A very loose weave may release stitches; a tightly woven cloth can be difficult to punch and may be damaged by a large needle. If you are unsure about a combination, test it before cutting your final piece.
The yarn also needs to move freely through the needle. If it catches in the handle or eye, a stitch can lift out as you move to the next one. If it is much thinner than the needle is designed for, the fabric may not grip it well. Pull a length of yarn from the ball and let it feed without resistance. Keep it clear of your hands and the edge of the frame as you work.
Punch with steady depth and spacing
Stretch the foundation evenly in a sturdy hoop or frame so that it feels taut, not distorted. Follow the instructions for your needle to identify which side will show the loops. Then push the needle into the fabric to a consistent depth, lift its tip just above the surface and move to the next position. Lifting it high or pulling backward can draw out the loop you have just made.
Aim for stitches close enough to support one another without crowding the cloth. Wide gaps can leave individual loops easier to snag, while excessive punching into one area may weaken the foundation. Work a small section, turn the frame over and check the loop side. If a loop is taller than its neighbors, resist pulling on it from the front. You can often ease the yarn back along the stitch path from the working side, or remove and repunch that short section.
Handle color changes and loose ends gently
When you finish a color or run out of yarn, stop with a little length left on the working side. Cut the yarn rather than pulling it back through the last stitch. Begin the new length nearby and leave a tail there too. Once the area is complete, trim stray ends so they will not catch during finishing. Avoid yanking either tail to make it disappear; that force can undo adjacent loops.
Before adding a backing, examine both sides of the piece. Fill obvious gaps and repair any stitches that lift easily under a light touch. You do not need to test by pulling hard on the loops: punch needle is intended to hold through normal display, not forceful tugging. If a border is part of the design, keep its stitches as even as those in the center, where they have neighbors on every side.
Finish the hanging without crushing the loops
Leave enough foundation cloth around the design to fold or secure its edges. For a framed piece, keep the fabric evenly tensioned as you attach it to its support, and make sure the support does not press against the looped face. For a hanging with a sewn backing, attach the backing around the perimeter rather than stitching through the textured design. The backing can cover loose ends and give the piece a tidy reverse, but it cannot compensate for a foundation that fails to grip the stitches.
If you choose to use adhesive, test it on a sample first. Some products can stiffen the fabric or seep through to the loops, changing their appearance. Many decorative hangings can be finished without coating the entire reverse. Hang the completed piece where it is unlikely to be brushed repeatedly, and lift dust gently rather than scrubbing the surface. Good material choices and careful punching do most of the work of keeping the loops secure.