Choose a cover and gather your tools
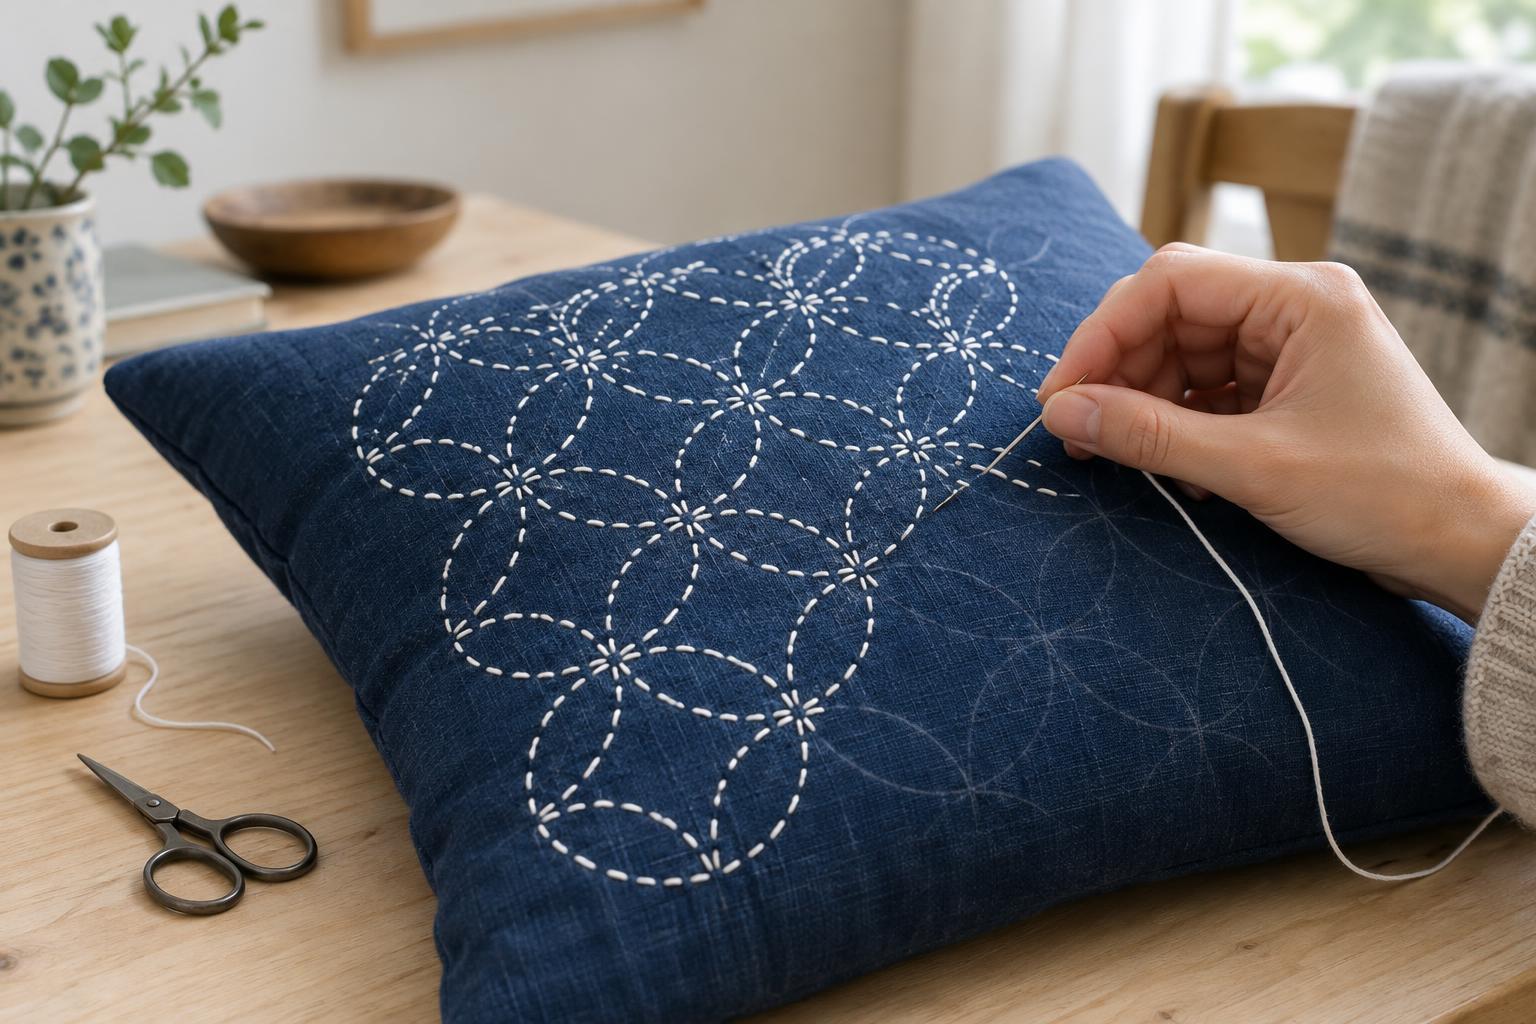
Sashiko is a Japanese stitching tradition known for repeated running stitches and geometric patterns. For a first decorative project, a grid of straight lines or a series of parallel curves is easier to manage than an intricate motif. The aim is not to make every stitch identical, but to create a steady rhythm that looks pleasing across the cushion.
Choose a plain woven cover in cotton or linen with enough body to support the stitching. A removable cover is convenient because you can work with the insert out. If you are sewing a cover from scratch, decorate the front panel before assembling it. Wash and dry new fabric first if you expect to launder the finished cushion; this reduces the chance of the fabric shrinking around the stitches later.
You will need a needle suited to your thread, contrasting cotton embroidery or sashiko thread, scissors, a ruler, and a removable fabric marker or tailor’s chalk. A thimble can help if the fabric is firm. Test both the thread and the marking tool on a hidden area, checking that the marks come out as expected and that the thread does not shed color when damp.
Plan a pattern that fits the cushion
Keep the design clear of the cover’s seams, zipper, buttons, or other closures. A stitched rectangle centered on the front is a flexible starting point: it leaves a plain border that frames the work and avoids bulky edges. Alternatively, place a narrower band of stitching near one side for a less symmetrical look.
For a simple grid, mark several evenly spaced horizontal lines, then add vertical lines across them. You can stitch only the horizontal lines for a subtle effect or stitch both directions for a denser surface. Leave enough space between lines to see the fabric beneath. If you prefer curves, trace the rim of a bowl to guide a row of overlapping arcs, making sure each arc connects neatly with its neighbors.
Before marking the whole cover, set it on the chair or sofa where it will be used. Step back and check whether the pattern sits where you want it when the cushion is upright. A design that looks centered on a flat cover may appear slightly low once the insert fills it.
Work the running stitches
Remove the insert and smooth the cover on a table. Take care not to stitch the front and back layers together. If the cover opens widely, fold the back out of the way; otherwise, slip a piece of cardboard inside as a temporary barrier. Thread the needle with a manageable length of thread so it does not tangle as you work.
Begin at one end of a marked line, leaving a short tail on the inside of the cover. Make a running stitch by bringing the needle up and down through the fabric at regular intervals. You can load a few stitches onto the needle before pulling it through, but avoid gathering so much fabric that it puckers. Smooth the cover flat after each short run and adjust your tension as needed.
On a grid, consider how lines meet at the intersections. Leaving a tiny space between stitches at each crossing can keep the intersections from becoming crowded. Follow the same approach throughout the pattern rather than trying to correct every small variation. If a line wanders or the fabric pulls in, remove a few stitches and try again with a lighter hand.
Secure the thread and finish the cover
At the end of a line, take the needle to the inside and weave the thread tail under several existing stitches before trimming it. Secure the starting tail in the same way. Small knots are another option, but woven-in ends tend to lie flatter against a cushion. Check that the reverse side is tidy and that no loose loops could catch when you remove or replace the insert.
Remove the pattern marks according to the marker’s directions, then let the cover dry fully if you used water. Press it from the reverse side with an iron setting suitable for the fabric, placing a cloth beneath the stitched area to help preserve its texture. Reinsert the cushion and gently ease the cover into shape rather than pulling on the embroidery.
For routine care, follow the cover fabric’s washing instructions and use a gentle approach that suits the thread as well. Repair a loose stitch promptly so it cannot snag. Once you are comfortable with the basic grid, try changing the scale, stitching a single corner, or combining short lines into a motif that suits the other textiles in the room.